|
Typically I’m not too fond of soups, but I started making this broth a few years ago when I was trying to learn more about nose-to-tail eating.
Nose-to-tail eating is a way to reduce food waste and promote sustainability. The idea is simple: rather than just eating the muscle meat of an animal, we should use all parts of it, including the organs, bones, and connective tissues. Not only is this approach more sustainable, but it can also be a great way to support healthy eating for fat loss and muscle gain. First and foremost, nose-to-tail eating is a great way to ensure you're getting a wide range of nutrients in your diet. Organ meats, for example, are rich in vitamins and minerals that are often lacking in muscle meats, such as vitamin A, vitamin D, and iron. Bone broth, which is made from simmering bones and connective tissue, is also packed with nutrients like collagen, glycine, and glucosamine, which can support joint health and digestion, and is what I am showing you below. In terms of fat loss and muscle gain, nose-to-tail eating can be particularly beneficial. For one, the protein in organ meats is typically more bioavailable than that in muscle meat, meaning it's easier for your body to absorb and use. This can help support muscle growth and repair, which is essential for gaining strength and building lean mass. Additionally, bone broth can be a great way to support fat loss. The collagen and gelatine in bone broth can help keep you feeling full and satisfied, which can help prevent overeating and support weight loss. Plus, the nutrients in bone broth can support gut health, which has been linked to improved weight management. Again, nose-to-tail eating is a sustainable approach to healthy eating. By using all parts of an animal, we can reduce food waste and make more efficient use of our resources. Plus, where possible, choosing pasture- raised, grass-fed meats can further support sustainability by promoting regenerative agriculture practices. Nose-to-tail eating is a sustainable and nutritious approach to healthy eating for fat loss and muscle gain. By incorporating organ meats and bone broth into your diet, you can support a wide range of nutrients, promote muscle growth and fat loss, and reduce food waste. Plus, by choosing high-quality, sustainably-raised meats, you can support a healthier planet as well; what’s not to like?! As I mentioned earlier, I don’t like weak, watery soups (I just don’t see it as a meal!) so I make this broth quite meaty by ensuring I have picked off as much meat as possible when prepping this meal. Method Start by roasting a whole chicken (free-range/organic/pasture-raised if possible) perhaps for a roast dinner or anything else which requires chicken meat. When I do this at home we will use the breasts for our roast dinner split between 3 of us and serve with seasonal veg and gravy for a Sunday roast. This will still give me around 50g of protein in that meal. I then pour all the juices and jellies from the roasting tin, plus skin, into a stock pot and place in the chicken carcass to cool down and come back to this after we have eaten. Once we have eaten I return to the carcass and pick off every little bit go meat and put in a dish, cover and put in the fridge. With all of the juices and skin in the stock pot, use a cleaver to break up the bones, you don’t want them to be too small to fit past a sieve, but you want to be able to pack it all down as tight as possible later. Very roughly chop some seasonal vegetables; I enjoy this in the autumn, so carrots, onions, leek ends (use the rest of the leek later to serve). Keep the skins on and really don’t worry about chopping nicely; literally a carrot could just be cut into 4 or 5 chunks and thrown in the stock pot. Even leave the skin of an onion on, roughly chop in half and into the pot. Like I said, if using leek, just chop off the ends that ordinarily you may throw away or compost or give to the chickens and put the ends into the stock pot and leave the rest of the leek in the fridge for later. Season with salt and pepper, and throw in some parsley, thyme and garlic. Pack all of this down into the stock pot as low as possible, you are now going to cover with cold water and the idea is to make a stronger broth; the more water you use the weaker it will be. If you are using a medium size chicken carcass with a few veggies as above then you will most likely need 1.5 litres to 2 litres of cold water to cover the ingredients. Simmer for 3-4 hours with the lid on. [just a note that simmering is to very gently bubble and not boil. You don’t want to lose your broth] it will start to make your kitchen smell amazing. Once simmered for around 3-4 hours, sieve, leave to cool and put in the fridge. The next evening when you are ready to eat ladle into a pan the amount of broth you need and bring to a simmer. Add the cold chicken meat which you picked off from the day before, leftover from a roast, and add your fresh, diced seasonal veg such as carrot, leek, peas (we use frozen!). Again, get to a simmer again and cook through.
0 Comments
We are predominantly a private training gym: I help men and women with weight training on a one-to-one basis in the privacy of our exclusive gym in an effort to transform their physiques and increase strength. But on top of this I really like to advocate seasonal eating and a greener lifestyle, which I find goes hand-in-hand with transforming your body, and I call this the 'Healthier, Happier, Greener' lifestyle.
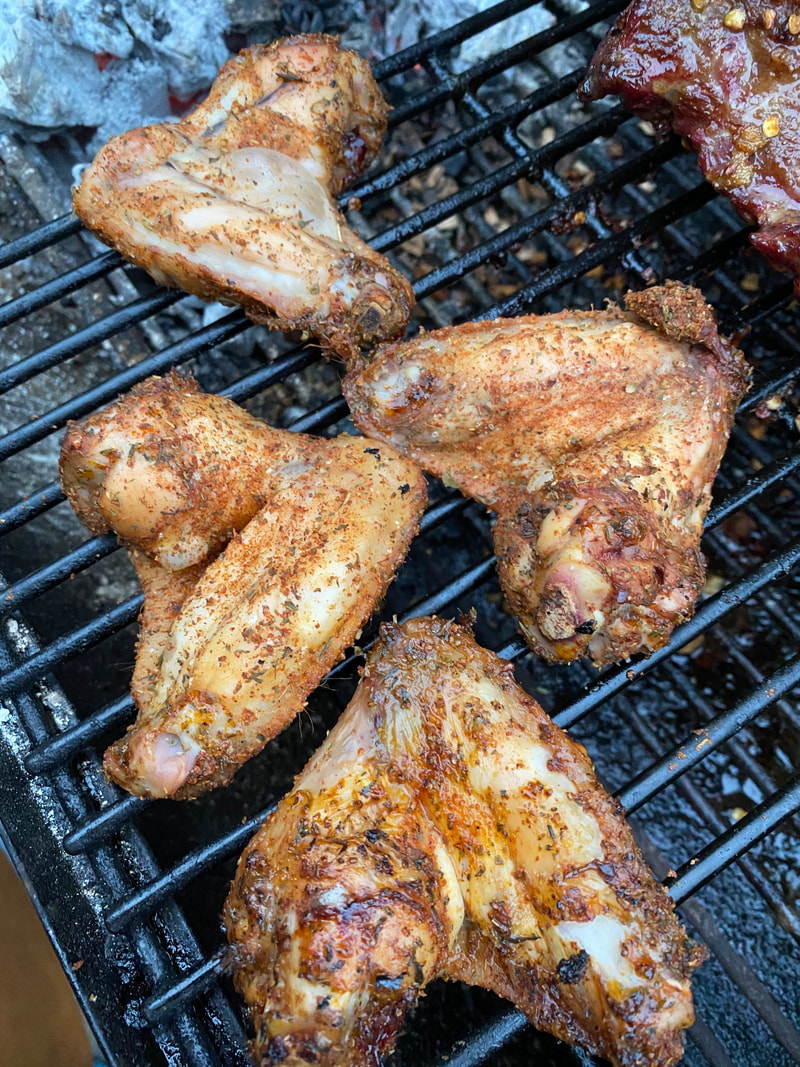
Getting in better shape is a fantastic decision towards having a healthier lifestyle, but I believe the process should also make you happy. Eating in tune with the seasons, reconnecting with nature, learning new skills and bringing the outdoors into your own home will be healthy for you, be better for our planet and in turn make you so much happier in yourself. Follow and join us in our ever-progressing endeavour for a healthier, happier and greener lifestyle here at ForestFit... Everyone who has the ForestFit eBook ‘Healthier, Happier, Greener: A Taste Of The Seasons’ will know that I always ask myself 3 simple questions for almost all my actions... 1/ “Will it make me healthy? 2/ Does it make me happy? 3/ Is it ‘green’ for the planet?” This can be applied to decisions regarding your meals, but also all of your actions! Take your first steps toward a HEALTHIER, HAPPIER, GREENER lifestyle with my recipe eBook, 'A Taste of the Seasons’. 12 recipes, one dish to represent each month of the year, showing you how you can eat healthier, more nutritious and mouth-watering, tasty food! Food enjoyed within its natural season and grown closer to your home is more nutritious, tastes far better and is greener for the planet. Together, we can enlighten ourselves on what can be grown here in the UK (or wherever in the world you are!), helping support local farmers so that we can prepare, serve and eat fresher, tastier food! In some cases you may even be tempted to grow your own, which would be even more of a ‘happy’ bonus! We grow lots of our own food and it definitely helps me with my fitness-goals. Having the same foods available all year round is actually unnatural, but consumers’ demands mean that our food travels for miles and miles as it is flown in from all around the world so that our supermarkets are consistently stocked with the same range all throughout the year. But it can be so much more exciting than that! Through Spring, Summer, Autumn and Winter nature offers us a different selection of homegrown items, so let’s make it our task to find out what is growing each season and each month, learn new and exciting recipes, and benefit from a lot more vitamins, minerals and good quality protein! Mouth-watering, homemade fast food at its finest! This recipe is so easy and fast to put together and relatively healthy within a considered diet. If you are doing the classic of keeping your carbs pretty low and protein high the rest of your day then a portion of this (even every day) would be absolutely fine to hit your fat-loss goals! Of course you could sub the chicken for your own preferred protein and it will taste great. I always cook lots as they are a delicious snack/meal for a few days after, which saves you eating junk. Seriously, imagine being sat in front of the TV wanting a “midnight snack” or at work mid-afternoon and instead of grabbing a fast snack like crisps and regretting it - you grab an equally quick portion of oak-smoked chicken wings! Yum. Let’s just make them already!
How do we make them? For about 2kg of wings:
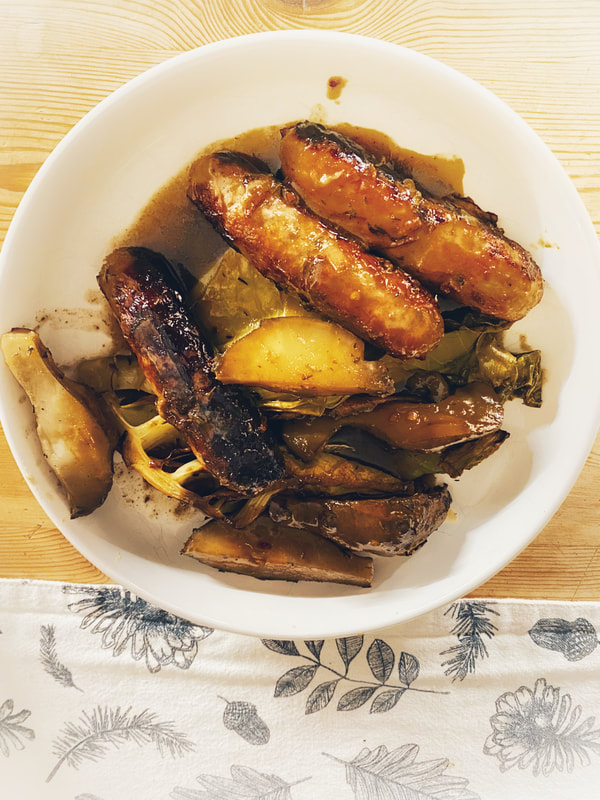
Thoroughly mix all herbs and spices, then rub into wings. Start coals on your barbecue or smoker (I use a chimney starter) and also place a handful of oak wood chips or chunks in a small bowl of water and leave to soak until coals are ready (around 20mins). When the coals turn a light grey spread around your smoker/barbecue. Place your wings on the grill (top shelf if possible). Pat dry your wood chips and scatter amongst the coals. Close the lid and slightly open vents. Allow to cook for 15-mins with lid down (temp should be around 200C), then flip wings and repeat (close lid, vents slightly open and cook for 15-mins). Finally, open lid, place all wings on grill closest to coals, keeping lid open, to finish them on a higher temp and allow to blacken a little for a slightly crispier texture and authentic barbecue flavour. You may need to alter your cooking time to suit, but internal temp of the wings should be 75-80C. Always check. Proof that eating seasonally will improve the variety of food you eat! I had never eaten a Jerusalem artichoke before, so I chose this meal for my first taste as there is minimal effort that goes into its preparation meaning you get to taste it in a fairly raw form. We were pleasantly surprised with the results. We've definitely been missing out, I think the main reason being that we had never been exposed to this veggie as children, so it always seemed a bit weird to see one in a shop - being creatures of habit it's easy to just leave it alone, not knowing how it tastes or what to do with it, and stick to the veggies we know. Ultimately, we now have another fantastic tasting ingredient added to our winter pantry! So, for this very simple and healthy, seasonal recipe, you'll need... A little oil of choice 8 pork sausages 500ml chicken stock 500g Jerusalem artichokes (no need to peel for this recipe; just scrub clean and cut into halves) 1 Savoy cabbage seasoning thyme paprika chilli flakes Fry the sausages for about 10-minutes to brown them.
Add them to a deep baking tray along with the chicken stock and the Jerusalem artichokes, cover and cook in the oven at 180C for 15-minutes. Lift the cover, add the seasoning, thyme, paprika, chilli flakes and cook again for 15-minutes. Finally, add the cabbage leaves and cook for a further 10-15 minutes.
All you need is...
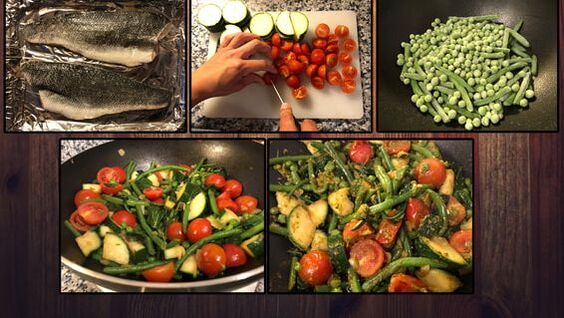
This is not just my favourite meal in July, this is one of my absolute favourite meals of the year and another reminder why I love to eat seasonally. There are other months that I can grill sea bass throughout the year but when this fish is combined with these amazing, summery, seasonal vegetables (and fruit - tomato) the flavours are immense and, in my view, unbeatable! Here's what you'll need... 2 Sea Bass Fillets Handful of Spinach Half a Courgette sliced and cut into quarters Handful of Green Beans Handful of Cherry Tomatoes cut into halves Handful of Garden Peas 4 teaspoons of Pesto 2 teaspoons of Coconut Oil (if cooking at home) Heat up a pan, adding your oil, on a medium heat. Place Sea Bass Fillet skin-side down for 5-minutes until they crisp up. Add the courgette quarters, cherry tomato halves, peas and green beans, and fry for another 3-5 minutes or desired doneness. Add your pesto and heat through before serving. How simple is that? I sometimes add a tablespoon or two of cold extra virgin olive oil over the meal once cooked. I call this Wild-Style because I quite often make this outdoors, as it tastes even better grilled BBQ-style.
|




 RSS Feed